Application of 3D scanning spray

by M. Montalti, Sales Development Engineer Reflecon, MR Chemie

The ideal application is a homogeneous matting layer and a compromise between various requirements:

Necessary layer thickness: An reflective or shining surface requires a thicker layer than a black surface.
Necessary sublimation time:
A thinner layer sublimates faster than a thicker one.
Measurement uncertainty of the scanner:
It is easy to understand that a layer thickness of a few micrometers hardly influences the measurement result if the scanner used has a greater measurement uncertainty.
Software:
Depending on the mode and settings of the software used, which converts the generated point cloud into a 3D object, outliers can be smoothed out, but the measurement result can also be falsified.
It is generally recommended to apply only as much REFLECON 3D scanning spray as is necessary. In most cases, the object does not have to be sprayed “snow white”, but a very thin and fine layer is sufficient to break the reflection sufficiently for a 3D scanner to capture the object. Always think about, that applying more spray leads to an overlap of different spray layers, so that the layer thickness increases. In cases where special precision is required, this could be critical. Therefore it is not possible to make a general statement about the perfect application. It is much more about getting experience for your specific applications and developing a feeling for how much spray actually needs to be used. If the sprays are used consciously and correctly, there is no risk of a measurement result being significantly falsified. We offer sprays with different coverage classes and sublimation times, which you can use as a guide to select the right one. The specified sublimation times are intended as a rough guide. Sublimation is a change in the aggregate state whose speed depends on various factors: layer thickness, medium temperature, room temperature, air humidity, air circulation, surface properties and other influencing factors. For a particularly fine, precise and homogeneous application, we recommend using a spray gun. The various parameters such as operating pressure, nozzle and needle diameter, definition of the air and material flow and the setting of the spray jet can have a significant influence on your spray pattern. Before using a cordless spray gun, be sure to compare the information in the operating instructions for your cordless spray gun with the information in the relevant safety data sheet for the medium and pay particular attention to the permissible flash point.

How do we determine the layer thickness of the REFLECON 3D scanning spray?

In order to evaluate the layer thickness and the homogeneity of the application of our 3D scanning spray, we carried out a series of tests with a 4K digital microscope from Keyence from the VHX series. The microscope is capable of detecting height differences in the measuring range under consideration. To do this, we sprayed glass plates once “very thin” and once “very thick”, which were then measured. This process was repeated with all scanning sprays and an attempt was made to keep the respective “very thin” and “very thick” application at the same level as far as possible in order to achieve comparable results. As the application from a hand-held aerosol can is not reproducible, the results only provide a guide.

Below you can see how we define a “very thin” and a “very thick” application in the test. We worked with REFLECON Tarnish 11 from the aerosol can. A similar series of tests with our container products and a spray gun will follow at a later date.
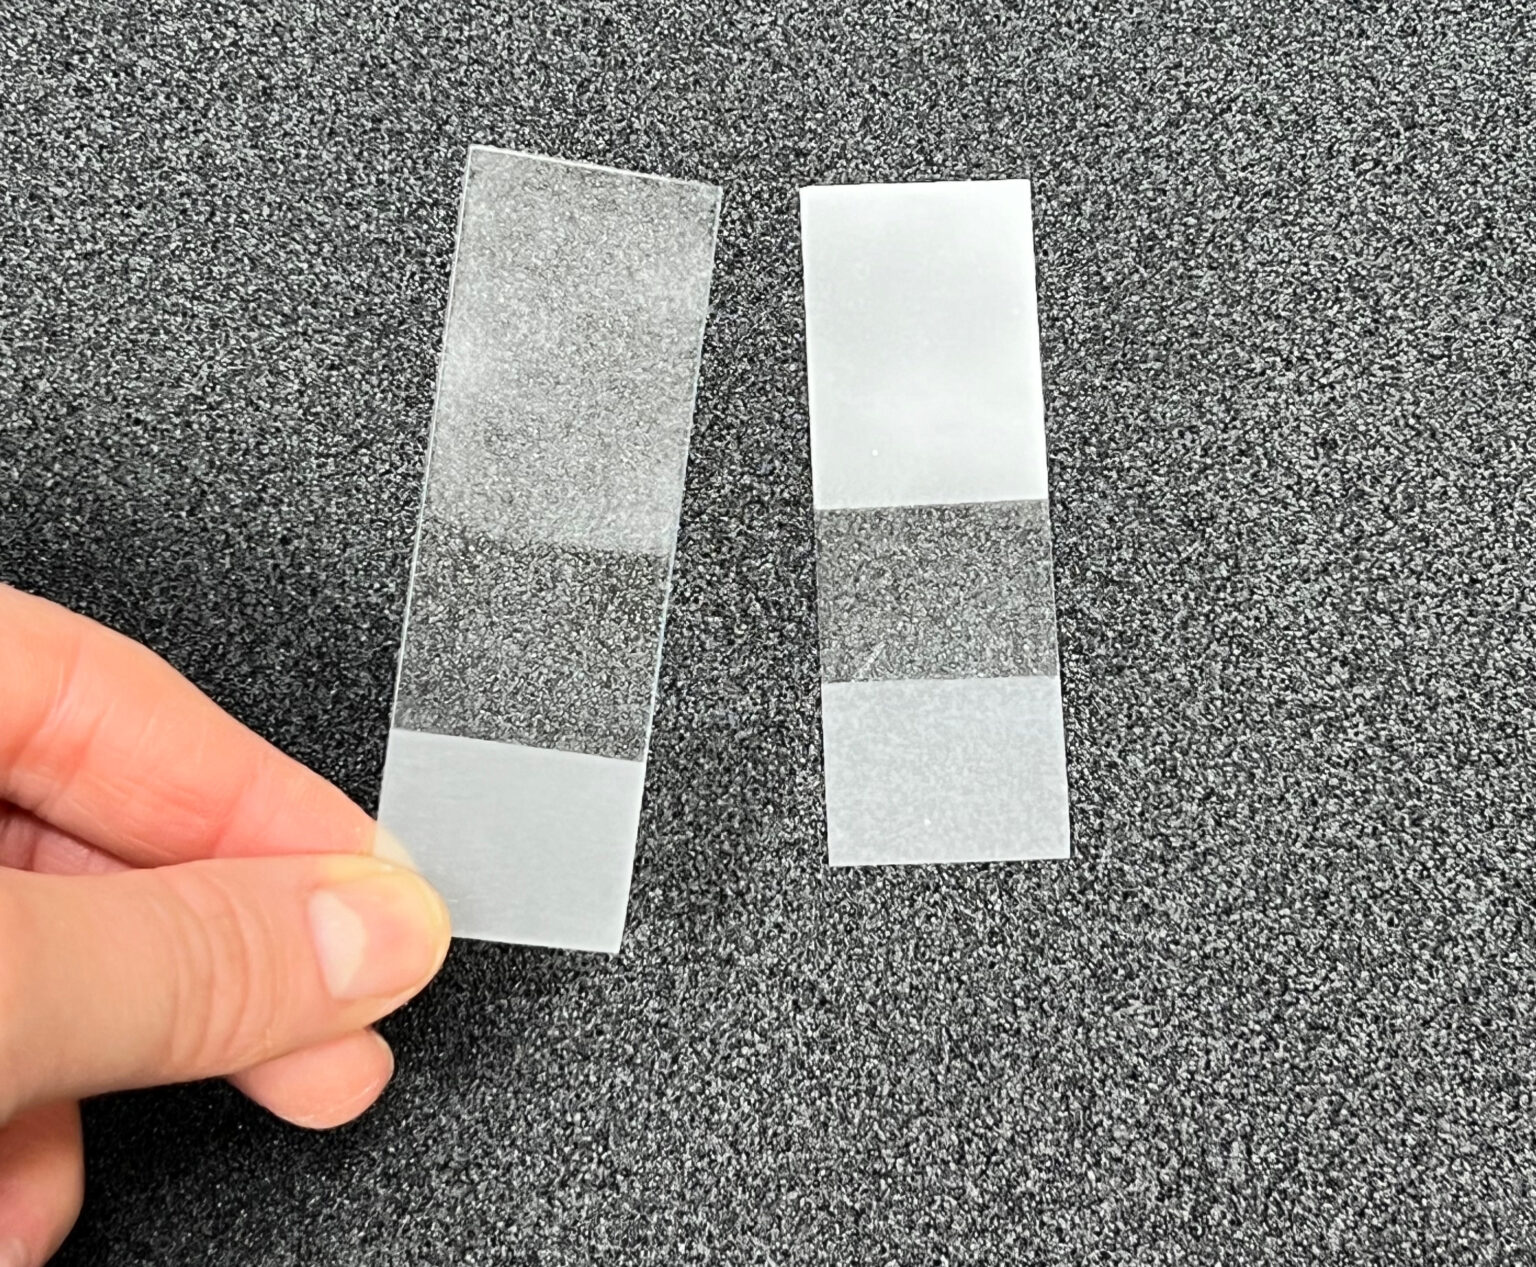
Figure 1: Coated glass plates. Left "very thin", right "very thick"

What layer thickness of the REFLECON 3D scanning spray did we determine?
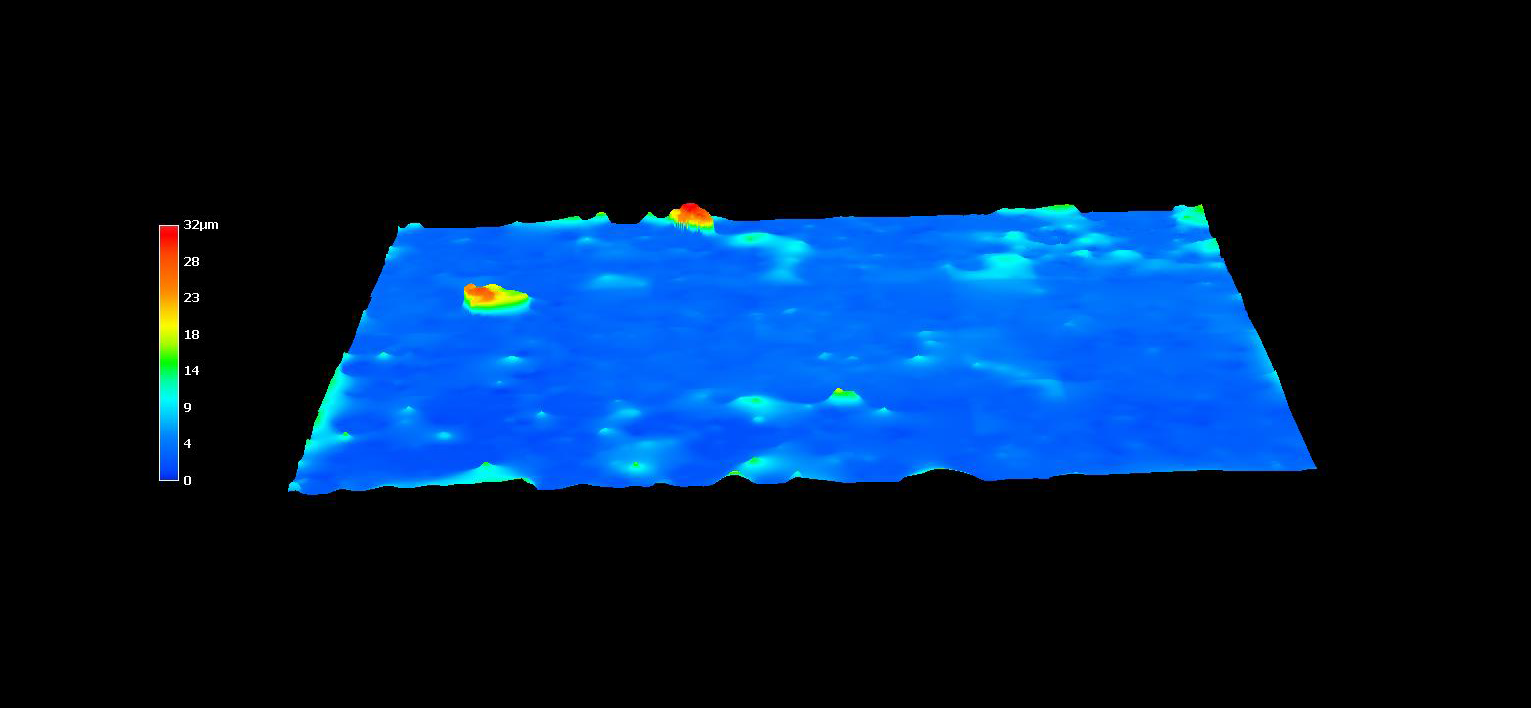
Figure 2: RT11 "very thin"

The microscope creates a color map showing the different heights of the applied layer. The scale on the left shows that dark blue stands for a layer thickness < 4 μm. Light blue, green and yellow are followed by the red range up to 32 μm. In our measuring range, we can see a few yellow and red dots in the range of 18-32 μm, some in the light blue to green range of 14-18 μm and predominantly a dark blue colored area with < 4 μm. We recognize a very homogeneous layer with few outliers.
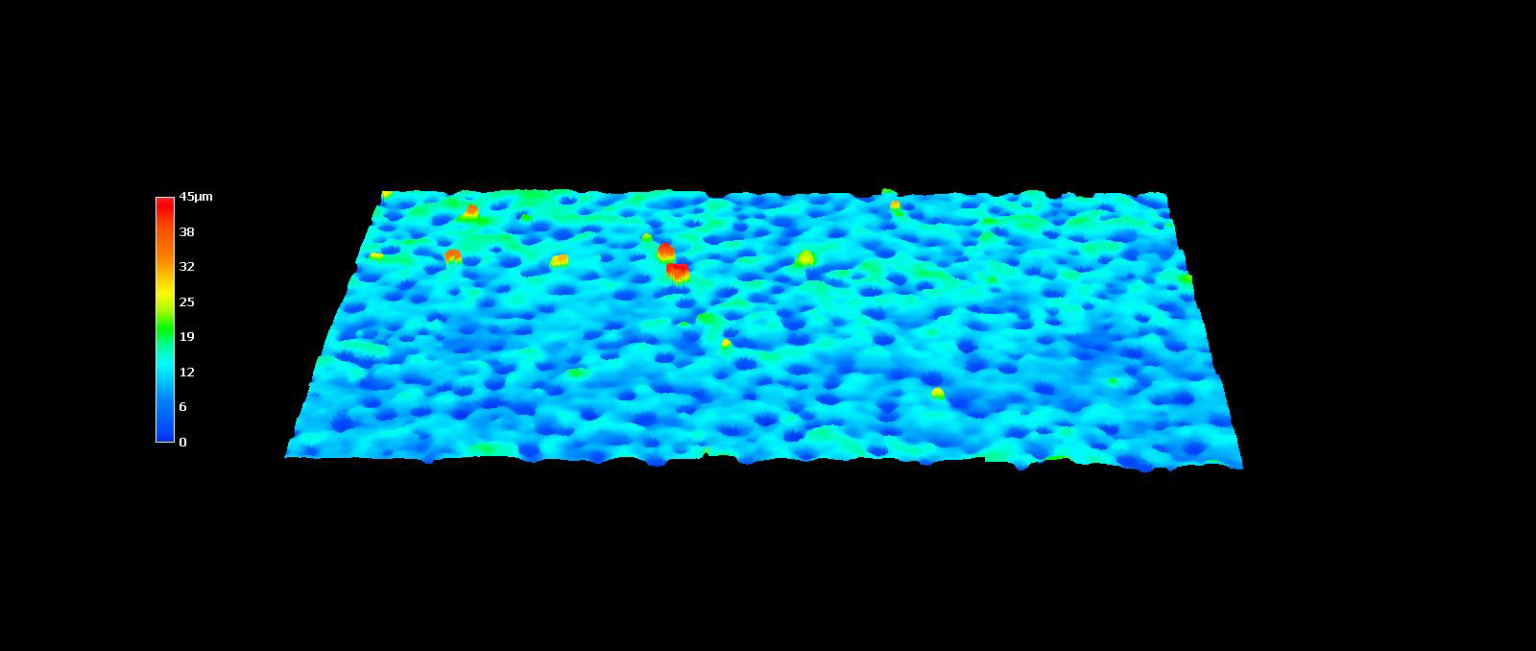
Figure 3: RT11 "very thick"
The color map of the “very thick” sprayed glass plate also shows a very homogeneous image with hardly any outliers. While dark blue predominated in the previous image, the light blue portion is significantly larger here and the layer is therefore twice as thick.   At this point, it should be emphasized once again that the glass plate was deliberately sprayed with significantly more spray than would be necessary for the 3D scan. The point here is to recognize differences.

The measurement results of our other scanning sprays can be found in the respective product information.

Master the application of the 3D scanning spray

You are currently viewing a placeholder content from YouTube. To access the actual content, click the button below. Please note that doing so will share data with third-party providers.

More Information

Your contact

Picture of Mario Montalti

Mario Montalti

Sales Development Engineer Reflecon

0160 94750556
m.montalti@mr-chemie.de

WE WILL BE HAPPY
TO HELP YOU

With high quality products for
Non-Destructive Testing, 3D Laserscanning
and the hygienic sector

NEWSLETTER

Stay up to date – always and everywhere! And never miss any news about products, innovations and promotions with our newsletter. Subscribe now!

CLICK HERE TO SUBSCRIBE

MR Chemie GmbH

Address:
Nordstraße 61- 63
59427 Unna
Germany

Contact us

Tel.:

Fax:
E-Mail:

+49 2303 / 95151-0
(07:00 until 15:30)
+49 (0) 2303 / 95151-10
post@mr-chemie.de
contact@reflecon.com

CONTACT